Barred Instrument Exploration Activities
Let’s look at some ways to introduce the instruments through a few different pathways: a fingerplay, a circle dance, and a picture book.
We’ll prioritize using them respectfully and playfully.
We’ll highlight playing technique to students who are new to these instruments, or to students who need a refresher.
Let’s jump in!

Barred Instrument Exploration: Setting the Tone
Here is a quick guide to getting started with barred instruments.
Instrument Mechanics

Which is the high side? Which is the low side? Students who are new to the barred instruments can need guidance on how to tell the difference.
Barred instrument exploration allows us time to get acquainted with how the instrument is constructed.
Our instruments are shaped like a mountain. The narrow side is on top, the wide side is on the bottom. Even when we move the instrument around, no matter how we look at it, the high and low sounds of the instrument stay the same.
Holding the Mallets
I ask my students to pinch the mallet with their index finger and thumb, then wrap their other fingers around the mallet, then turn their elbows out slightly like they’re riding a bicycle.
We want to avoid students playing the instrument with their thumbs facing up. Instead, we want the top of their hand to face the ceiling as they play.
Playing Technique
When we give space for barred instrument exploration, students have time to figure out how they need to maneuver their hands in order to get the best sound.
Students should play with a gentle bounce in the middle of each bar. Periodically dropping in verbal cues with this imagery can be helpful. For example, instead of exclusively saying “play this rhythm on G,” we can say “gently bounce your mallets to this rhythm on G.”
Getting to the Instruments
Take time to model and practice how to physically get to the instruments.
We always walk around the instruments. We don’t walk over. We don’t walk through.
Care and Respect
These instruments are very special! They may have made a journey to get to the music classroom, and were perhaps helped by grant funding from a particular organization, school funding, community donations, etc. Telling students the story of the instruments - how they got to be here, how valuable they are, etc. sets the one for how we approach them with care.
These instruments are tools we use to express musical ideas. We’re ready to use them when we show that we’re ready to treat them with care.
Culture of Play
In our first invitations at the barred instruments, we can infuse the interactions with a tone of play. Through the activities we’ll talk about today, students have opportunities to “noodle” around, and create their own sounds within our parameters.
Barred Instrument Exploration with Dona Arana
It’s no surprise that I’m excited to use Dona Arana!
In this sequence, after we sing the song with the fingerplay, we’ll use mallet exploration as the first step.
Dona Arana Overview
Mallet exploration
Barred instrument exploration
Barred instrument sound story improvisation
Step 1: Mallet Exploration
Sing the song and act out the story with mallets

The teacher sings and acts out the story with mallets. Students follow along.
A few students at a time use mallets and imitate the teacher. At the end of the song, they pass the mallets off to someone who was following along.
Eventually, every other student has a set of mallets.
Perhaps in another class, the teacher wonders, how could you tell the story of Dona Arana with your mallets, but change how you move your mallets? Still copy me, but find some small changes.
Repeat the activity, students find their own way to gently use the mallets to tell the story in a different way
Step 2: Barred Instrument Exploration
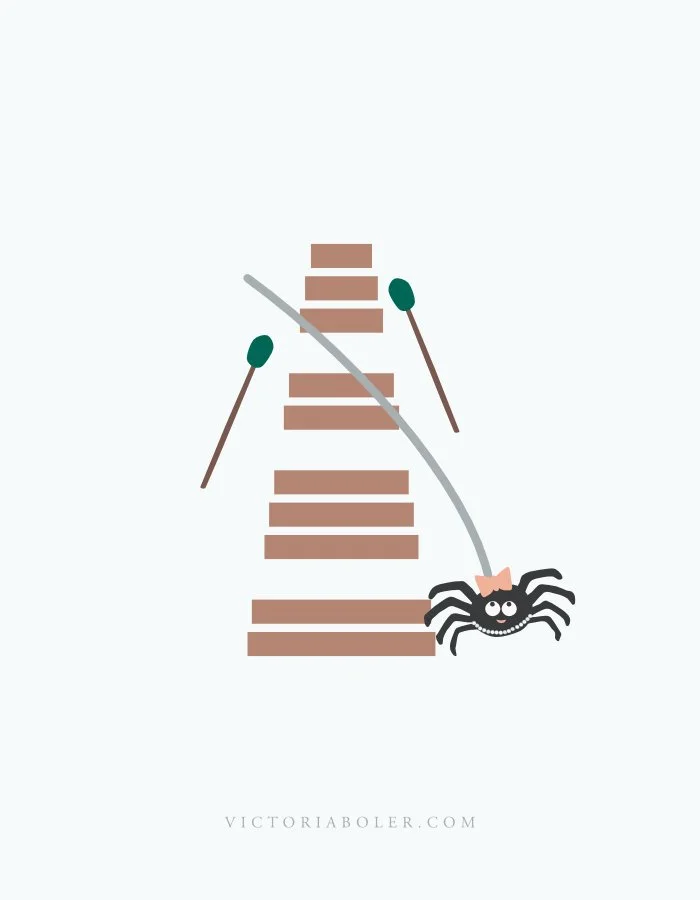
With a few instruments set up vertically, the teacher models what it sounds like for Dona Arana to walk at the bottom of the instrument, then spin her web up, then dance at the top of the instrument, then gently come back down.
A few students at a time come to an instrument and play the song with the teacher.
Doña araña se fue a pasear.. Let’s go for a walk on our instrument. You can do what I do, or you can walk a different way.
Hizo un hilo y se puso a trepar…. Let’s spin our webs up….. You can spin your web like mine, or do something different.
Students pass off their mallets to another student in the circle
Eventually, set up the instruments vertically so every third student (or so) has an instrument in front of them.
Repeat the activity. Add in playing position and rest position. Students at the instruments play the story while the rest of the class models without mallets.
When they’re done, students put down the mallets and the whole circle moves over one spot.
Step 3: Barred Instrument improvisation

What shape did Dona Arana make as she was spinning her spider web?
The teacher plays a short fragment, then echoes the fragment vocally.
Students take turns playing a short spider web song, then pass the mallets to someone who echoes.
Doña Araña Feedback
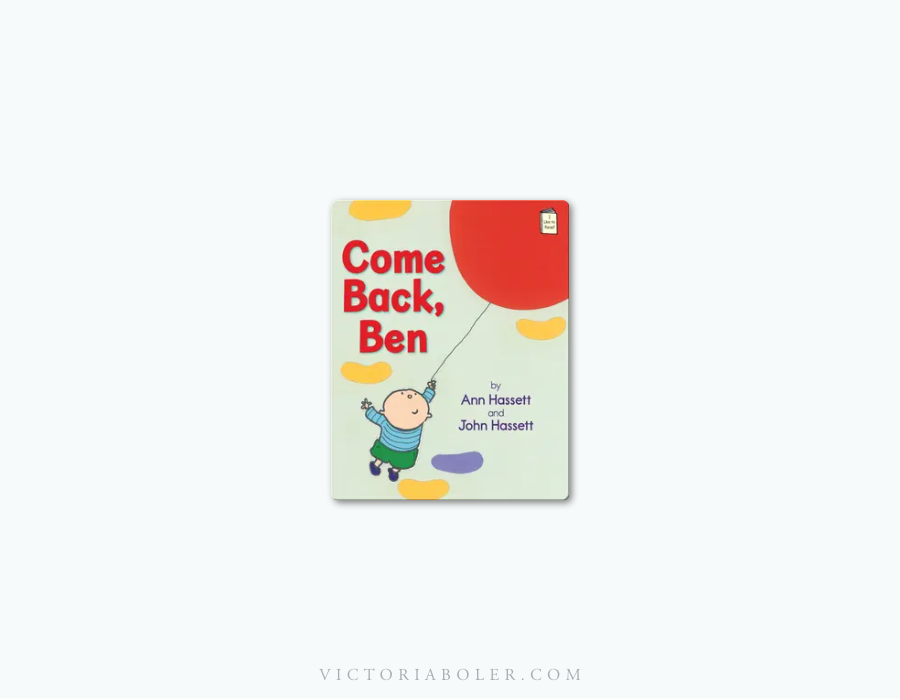
“Come Back, Ben”
These activities are framed around the book, “Come Back, Ben” by Ann Hassett and John Hassett.
Using a curricular lens, we’ll narrow in our melodic focus to sol mi, and sol mi la patterns.
“Come Back, Ben” Overview
Read the story
Movement and vocal exploration
Mallet exploration
Barred instrument exploration
Sing, move, and play the story
Step One: Read the Story
This is a delightful book about a boy who leaves his house on a balloon. The text is simple, but imaginative and playful.
In this step, we’ll read the story to students.
Step Two: Movement and Vocal Exploration
In the next reading, students find an empty space in the classroom to sit and listen to the story.
We’ll create our own illustrations of the story through movement and vocalization. Students follow the teacher’s cue to show their ideas, while staying in their spots.

The teacher reads the story again, and prompts students to use vocal and movement exploration throughout the book:
“Ben’s balloon went up” - the teacher makes a vocalization that goes up on a neutral syllable, and motions for students to echo the vocalization. Students move up as they echo
“Come back, Ben” - the teacher sings on a s m l s m pattern, and motions for students to echo
Bees - Choose one bee on the page to illustrate with your voice. Make gentle buzzing bee sounds as you trace the bee’s pathway in the air
Tree - Choose an apple from the tree. With your voice, make the apple gently fall from the tree, then roll down the hill. Staying in your personal space, show what that looks like by moving high to low as you vocalize
Kite - Trace the pathway of the kite’s string. Find a way to show that wiggly shape by laying on the ground in your own personal space.
Hill - Make your voice start at the bottom of the hill and climb up, then start at the top of the hill and climb down
Rainbow - Choose one color of the rainbow to slide down with your voice
Stars - Make twinkling star sounds with your voice while you twinkle your fingers in the air
Moon rocks - Make gentle rock sounds with your voice. Could you make gentle rock sounds by clicking your fingernails together? Tapping the floor? Scraping your shoe?
Step Three: Mallet exploration

Let’s transfer the vocal and movement exploration to mallets.
As a class, we’ll explore how the mallets can help show the story using a few selected pages from the book.
Demonstrate how to hold the mallets.
Seated in a circle, a few students at a time use their balloons (mallets) to help illustrate the text as the rest of the class continues to vocalize and move.
Students with mallets pass them to the person next to them.
Step Four: Barred Instrument Exploration
Look at the image of the hill. Notice that the high side of the hill is narrow. The low side of the hill is wide. This matches our instrument!
Hold the instrument up and demonstrate the high side and the low side. Notice that whichever way the instrument is placed (horizontally, vertically, upside down, etc.) the high side is always the narrow part of the hill, and the low side is always the wide side of the hill.
Place barred instruments vertically in the middle of the circle. Students sit behind the instrument in a row of three.
Each player in the row takes a turn making their balloon mallets gently move up the instrument, then back down, when the teacher prompts.
“Ben’s balloon went up…” Students play from low to high as the rest of the class vocalizes and moves in place
“Ben’s balloon went down… “ Students at the instrument play from high to low as the rest of the class vocalizes and moves in place
“Ben’s balloon floated right in the middle of the air…” Students play in the middle of the instrument as the rest of the class vocalizes and moves in place.
Students with the mallets pass them to the person behind them, then move to the back of the line.
Repeat until all students have had a chance to play
Step Five: Singing and playing the story

Place instruments horizontally in a circle. Students sit behind the instruments in a group of two or three.
As the teacher reads the story, the students behind the instrument continue to vocalize and move in place.
Students holding the mallets play their vocalization on the barred instrument.
“What would it sound like if you were a tiny bee buzzing gently on your instrument?” “What would you sound like if your mallets were gentle twinkling stars?” “How could you gently slide down the rainbow?”
Periodically, prompt students to hand their mallets to the person behind them and move to the back of the line.
“Come Back, “Ben” Feedback
I Don’t Care if the Rain Comes Down
This activity has been adapted from the takadimi concept plan in the 2023 - 2024 Older Beginners Planning Binder.
“I Don’t Care if the Rain Comes Down” Overview
Read the story
Movement and vocal exploration
Mallet exploration
Barred instrument exploration
Sing, move, and play the story
Step One: Circle Dance

I developed this circle dance for upper elementary students. With scaffolding, it’s an absolute blast! Especially for students who are new to this type of movement, take the time to work up to the full routine at tempo over several interactions.
Formation: Two concentric circles, students facing a partner
“I don’t care if the rain comes down” - both circles step to the right (face a new partner) the first time. The second time we sing that phrase in the song, step to the left.
“I’m gonna dance all day” - switch places with partner
“Hey hey carry me away” - play the rhythm of the words with snap, clap, pat pat pat pat clap
Introducing the Song:
Seated, the teacher sings and students pat a steady beat. Play body percussion to the rhythm of the words of “hey hey carry me away.”
How many times do we sing and play “hey hey carry me away”? (2)
Students sing and play that section of the song instead of the teacher.
Gradually, release more of the song as students’ responsibility
Scaffolding the dance:

Sing the song standing in a circle. Continue to play the rhythm of the words of “hey hey carry me away.”
Imagine there is an invisible partner standing in front of you. The teacher demonstrates switching places with an invisible partner at “I’m gonna dance all day,” then playing the rhythm of “hey hey carry me away” on body percussion.
All together in a single circle, students practice switching places with an invisible partner, and playing “hey hey carry me away.” When students switch places with their invisible partner, the whole circle will be back-to-back instead of facing forward.
Students find a partner in a scatter formation and practice on their own
One partner from each group moves to create a single circle. The other partner stands in front of them, creating a double circle.
Add a step to the right and to the left at “I don’t care if the rain comes down”
I find it helpful to change the words of the song “I don’t care if I step to the right” and “I don’t care if I step to the left”
Do a slow walkthrough, then add the song
Step Two: Body percussion improvisation
As a B section, add an improvisation invitation.
Students speak “hey hey carry me away” and the teacher models improvising four beats on body percussion. Repeat three more times.
The teacher speaks “hey hey carry me away” and students improvise four beats of body percussion.

Step Three: Barred Instrument Exploration
Now we move to playing barred instruments!

The teacher shows the high and low side of the instrument, like the instrument is a mountain, with the high narrow side at the top and the low wide side at the bottom. Turn the instrument in several different positions to demonstrate that the sides are always the same.
Seated in pairs at barred instruments set up in C pentatonic, students explore gentle raindrop sounds with their fingertips. As students play, the teacher prompts different images….
What does it sound like for the raindrops to gently fall from high to low? What does it sound like for the raindrops to fall low to high? What if someone splashed in a puddle in the middle of the instrument? What if someone slipped?
Eventually transition to bouncing mallets gently instead of fingertips. As students play, encourage them to verbalize their improvisation choices and explain their thinking to their neighbor.
Step Four: Barred Instrument Improvisation
Next, we’ll ask students to improvise four beats in call-and-response, linking our improvisations back to the body percussion in step two.
Recall the body percussion improvisation from earlier.
Students speak and play body percussion to “hey hey carry me away,” and the teacher models improvising a four-beat rhythm on one bar of the instrument. Repeat three more times.
Switch jobs. The teacher speaks and plays body percussion to “hey hey carry me away” and students improvise four beats on a single bar. Repeat three more times.
The teacher models moving improvising a melody by moving the mallets around the instrument
The teacher speaks “hey hey carry me away” and students improvise a four-beat melody at their instrument.
At the end of the activity, students turn to their partner and discuss what the activity was like for them - what is it like to make up your own rhythm and your own melody?
Step Five: Barred Instrument Rondo
In this rondo, half the class sings and moves to the circle dance. Half the class sings and plays barred instruments.
A section - All students sing the song. Players at barred instruments play a bordun and sing while players in the circle dance and sing
B, C, D, E sections - Students in the circle speak and play “hey hey carry me away.” Players at the instruments improvise a four-beat melody while their partner improvises four beats with body percussion.

“I Don’t Care if the Rain Comes Down” Feedback
Barred Instrument Exploration in elementary general music
Today we’ve looked at several pathways for exploring barred instruments in elementary general music.
In these activities we can prioritize a tone of respect and playfulness. With a fingerplay with lower elementary, a book with middle elementary, and a circle dance with upper elementary, we have examples of the many avenues we can take to creatively explore these instruments.