How to Edit Videos for Elementary General Music
In this post, we looked at how to navigate the set up for making videos for elementary general music.
Once we’ve created a video, what’s next? Do we really need to edit? What program should we use? How long will it take? What are the basics to getting a project like this off the ground? Let’s jump in!
GETTING STARTED
There are a few things to wrap our heads around before we jump into video editing.
The first idea is that there will be some obstacles in this process. The second idea is an acknowledgement that video editing isn’t necessary to be a good teacher.
Expectations
Sometimes our perceptions of video editing and the realities of video editing aren’t aligned. When this happens, it’s easy to get frustrated by things that slow down the production process.
Some of the most common frustrations when it comes to executing a video idea are:
Lack of storage space on your computer
Program or computer crashes
Freezing programs
The extra time it takes to walk through the process
A combination of these problems is likely to arise when we sit down to edit a video. If those problems aren’t something you have the capacity to handle, we can consider not editing the video at all!
You Don’t Need to Edit Your Videos
If you film a video on your phone camera and upload it to your students as-is, you have done enough!
An edited video is not what makes you a good teacher. Being a good teacher is a bout knowing your students, planning curriculum that meets their needs, and implementing the curriculum in a way that is joyful and musical.
You are more important than your tech skills.
That said, editing video can be a lot of fun. It can be a great opportunity for us to practice a new skill that opens up creative possibilities. If that sounds like fun to you too, let’s walk through the process together.

Addressing Common Frustrations
There are a few things we can do to set ourselves up for success before we start a project, and address some of the frustrations listed above.
Lack of storage space on your computer
This one is pretty straightforward. Go through your computer and delete any big files or applications that you don’t need. (For example, an outdated video project!) Once they’re deleted, empty your trash and restart your computer.
Crashing or freezing
Make sure you’ve exited out of all your extra applications or programs when its time to edit your video. You can also turn off your wifi so your computer has less information going on in the background. That will let it focus more of its attention on your editing software. Last, be sure to save your work often!
The extra time it takes to walk through the process
This problem is hard to avoid. No matter what form the actual lesson takes, you have your regular lesson prep to do. When we consider how much time you spend planning, then think about the time it takes to actually deliver the lesson, and then tack on the time it takes to edit, we’re left with a sizable chunk of time. Editing will take at least the amount of time you spent filming the lesson, because that’s the amount of footage you have to sort through. Therefore, if you filmed a 30-minute lesson, before you even start editing know that at the very least, your editing will take an extra 30 minutes, especially if you want to add text or any other graphics.
My top tips for lowering the amount of time you spend editing are:
Plan ahead. Having a clear picture of the end product before you turn on the camera will streamline the editing process significantly. Before you turn on the camera, it’s a good idea to know exactly what your goal is for each lesson segment, and exactly what you’ll invite students to do. Just like you wouldn’t walk into the classroom without a clear lesson plan, it makes sense to not turn the camera on before you’ve written out clear objectives and procedures. That helps the editing process go smoothly because the video itself is concise and focused.
Lower your expectations. This one is hard to hear. As my friend Beth Philemon explains, “You did not learn how to be a choir director in one day. You will not learn how to be a virtual choir director in one day.” This is a process that will take practice, just like any other skill.
Phone to the Computer
in the last post we talked about how to set things up to film videos for elementary general music.
Now that we have a video, the next step is to get it off your phone and onto a computer.
There are many ways to do this, but I recommend Google Drive.
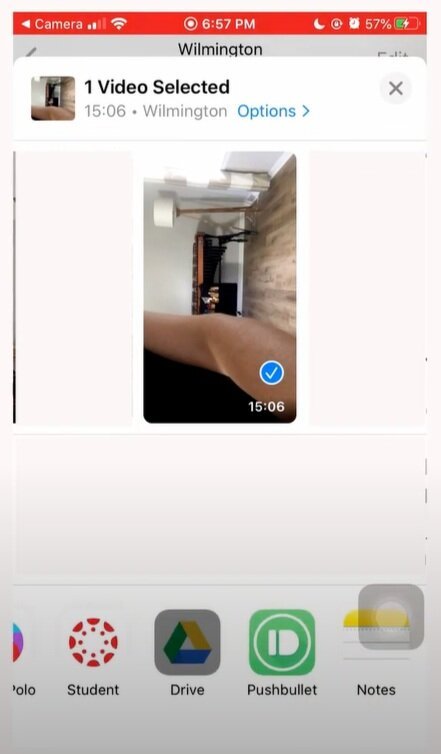
When your video is done, look for the share arrow, and then select Google Drive from the options at the bottom of the screen.
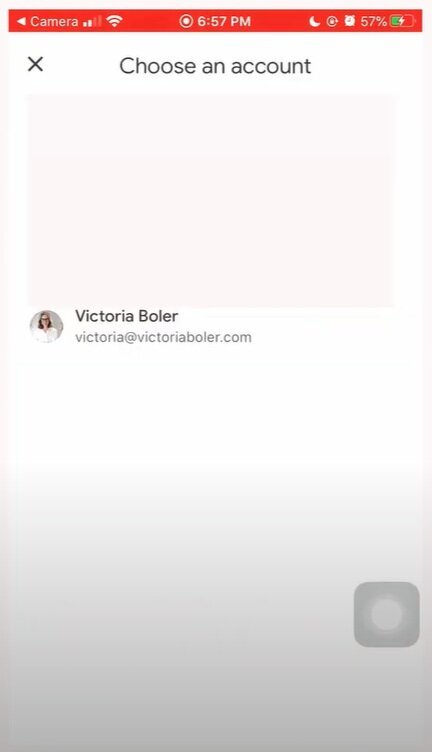
If you use more than one Google account, you’ll have the option to select the one you want to use.
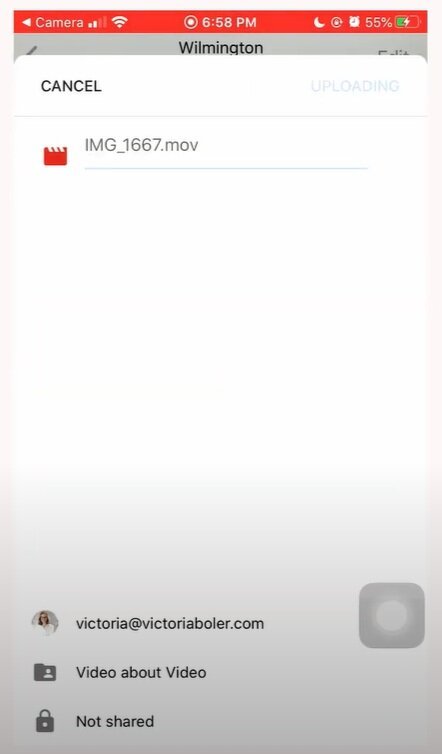
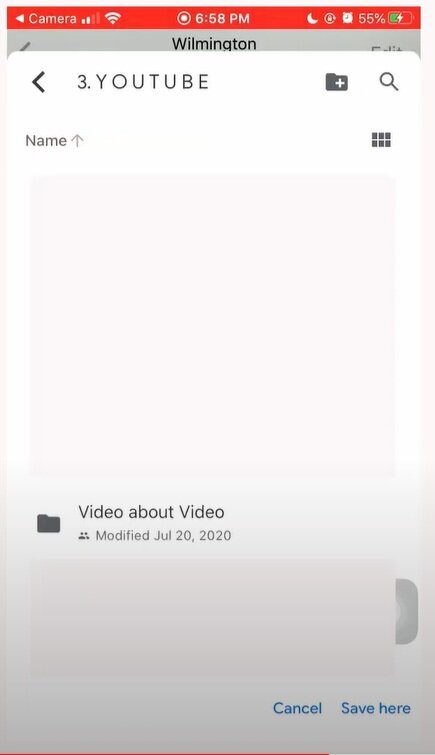
From there you can organize this file and store it within a specific folder. If not, it will just go into your main Drive. I like to make folders for each new video project so I can find what I’m looking for quickly.
Next, click the blue upload button at the top right hand side and wait for the video to upload to Google Drive. This part can take a while, so having your phone plugged in will help ensure that your battery doesn’t stop the upload process.
From Google Drive to the Computer
Now the video is uploaded to Google Drive. The next step is to get it off Google Drive and onto your computer.
This part is simple. Click on the video, and look for the download icon in the top right hand side.
This will download the video onto your computer, so we’re ready to edit.

choosing an editing software
Now we have the video on our computer. The next step is to choose what software we’ll use to edit.
There are lots of great options out there for video editing!
For the purposes of this post, I’m looking for something that is free, and that works on both Mac and PC.
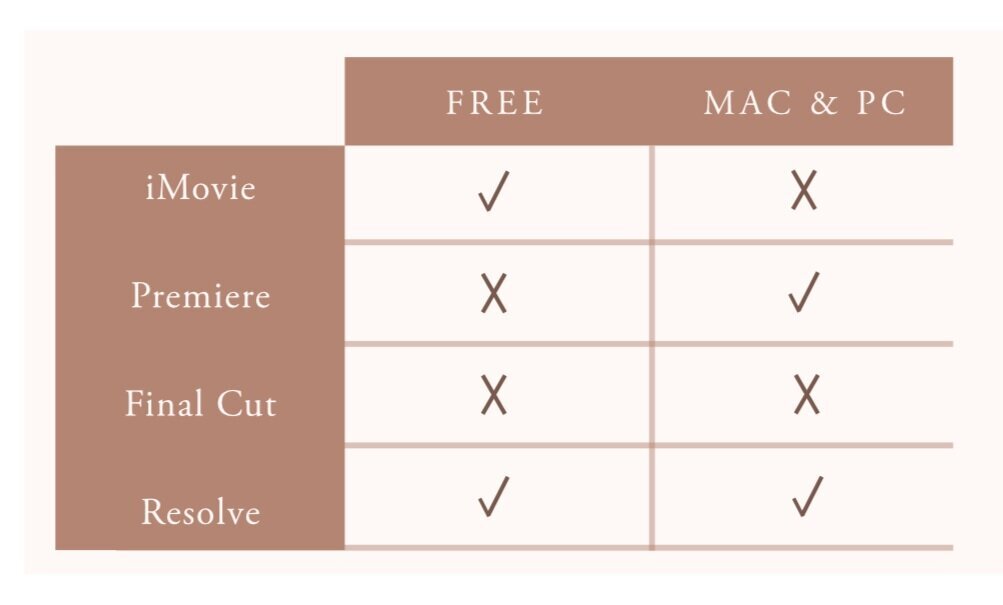
Out of iMovie, Premiere, Final Cut, and DaVinci Resolve, the only editing software that meets both those criteria is Davinci Resolve.
That’s what we’ll use today, but if you already have a software you use and love, stick with it! There’s no need to change something that’s working smoothly in your workflow.
To download DaVinci Resolve, go to their website and scroll all the way down to the bottom. Click the free download option.

TIME TO EDIT
With DaVinci Resolve launched, click on New Project to start your first new video.

My goal for this clip is to edit a short segment of the song, Apple Tree, so I’ve named this project, “I Love Apple Tree.”
Feeling Professional: The main Editing Page
This is the main page that opens in DaVinci Resolve.
You’ll feel like pro looking at all the options we could play with, but today, our process will be extremely simple.

Today we want to
Edit a few clips
Export the video.
Those will happen in the edit tab and the deliver tab at the bottom of the screen.


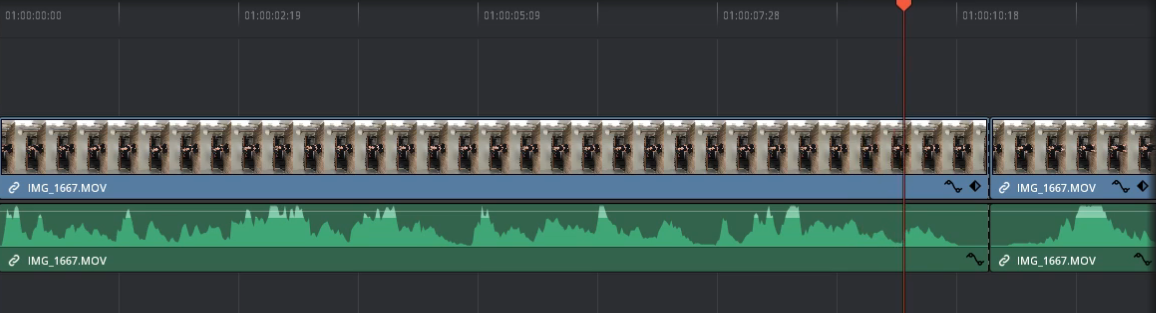
Drag and Drop the Video
From your computer, drag and drop your video onto the timeline in the editing page.


Resolve will automatically adjust the details of the project to match the video you filmed. Just click that you want the frame rates to be the same and you’re good to go!
Keyboard Shortcuts

When we’re ready to make changes to the video, there are a few things we’ll need to know.
These are all the keyboard shortcuts we’ll use for this project, categorized by PC and MAC.
Adjusting Volume
The volume from my cell phone is pretty low. I can change the volume by clicking the horizontal line that runs over the audio and dragging it up. I could also drag it down if I wanted the whole project to be quieter.

Breaking the Clips
With my audio volume up, it’s easier to tell where the song begins in the video.
This is because our singing voices are naturally louder than our regular speaking voice, so I can use the audio levels as a clue.

Editing in Two Steps
From here, the process is easy!
Simply control B to splice the clips where you want them to break.
Delete or shift delete to get rid of any clips you don’t want.

EXPORTING
The clips are broken up, and we’ve gotten rid of any extra material we don’t want in the final project.

Now it’s time to export!
In the “Deliver” tab, we can select our project settings.
This project will end up on YouTube, so that’s what we’ll select.
From there we can give the project a name and choose where it will save on the computer.
With those settings adjusted, we’ll click “add to render cue.”


When the project is in our render cue (on the right side of the screen), we can start the export by clicking “start render.”
Wrapping Up, Looking Ahead
This is everything you need to know to get started with editing video for elementary general music.
In the next video, we’ll look at how to add graphics to a project.
If you have any questions about this process, I’m not a tech person - I’m a music teacher. That said, I’m here to help in any way I can, so reach out with a comment below, find me on Instagram, or shoot me an email.